The application can be downloaded from the URL corresponding to the country and brand using the following path: /app.apk. For example: srbkfc.traxpire.cloud/app.apk
1. Download the apk file [![Screenshot_20230720-211336[1].png](https://book.traxpire.cloud/uploads/images/gallery/2023-07/scaled-1680-/tvjj0nV2Grtrc2jE-screenshot-20230720-2113361.png)](https://book.traxpire.cloud/uploads/images/gallery/2023-07/tvjj0nV2Grtrc2jE-screenshot-20230720-2113361.png) 2. Enable the permission for the browser [![Screenshot_20230720-211344[1].png](https://book.traxpire.cloud/uploads/images/gallery/2023-07/scaled-1680-/NJZy8VxqGQeStthR-screenshot-20230720-2113441.png)](https://book.traxpire.cloud/uploads/images/gallery/2023-07/NJZy8VxqGQeStthR-screenshot-20230720-2113441.png) [![Screenshot_20230720-211352[1].png](https://book.traxpire.cloud/uploads/images/gallery/2023-07/scaled-1680-/I0H9mArg2604Ngn2-screenshot-20230720-2113521.png)](https://book.traxpire.cloud/uploads/images/gallery/2023-07/I0H9mArg2604Ngn2-screenshot-20230720-2113521.png) 3. Open the downloaded apk file 4. Enable application installation permission for the browser [![Screenshot_20230720-211407[1].png](https://book.traxpire.cloud/uploads/images/gallery/2023-07/scaled-1680-/X56QIHV7eBquzS2d-screenshot-20230720-2114071.png)](https://book.traxpire.cloud/uploads/images/gallery/2023-07/X56QIHV7eBquzS2d-screenshot-20230720-2114071.png) [![Screenshot_20230720-211417[1].png](https://book.traxpire.cloud/uploads/images/gallery/2023-07/scaled-1680-/CyNduyHYqnOimIPh-screenshot-20230720-2114171.png)](https://book.traxpire.cloud/uploads/images/gallery/2023-07/CyNduyHYqnOimIPh-screenshot-20230720-2114171.png) 5. Enable all permissions for the application [![Screenshot_20230720-211459[1].png](https://book.traxpire.cloud/uploads/images/gallery/2023-07/scaled-1680-/oMZAtTjngkny37A5-screenshot-20230720-2114591.png)](https://book.traxpire.cloud/uploads/images/gallery/2023-07/oMZAtTjngkny37A5-screenshot-20230720-2114591.png) 6. Device is unregistered: "Network Access Denied" [![Screenshot_20230720-211518[1].png](https://book.traxpire.cloud/uploads/images/gallery/2023-07/scaled-1680-/lkyKVwBsIXGOqCV3-screenshot-20230720-2115181.png)](https://book.traxpire.cloud/uploads/images/gallery/2023-07/lkyKVwBsIXGOqCV3-screenshot-20230720-2115181.png) # Device registration If the device has internet connectivity, it will attempt to connect to the server set in the "Settings" menu to verify the registration. If the device is not registered or does not have a valid registration, an error message will be displayed.In application menu "Settings", the "**Server URL**" domain part should match with the proper domain and it always ends with "/api/v1/" (trailing slash). **After saving this setting, a full synchronization will occur** towards the configured server.
The device needs to be assigned to the restaurant through the website, in the "Devices" menu section.The device ID can be found in the 3 dot's "Information" menu. (see the last screenshot's 3rd row)
[![Screenshot_20230720-211518[1].png](https://book.traxpire.cloud/uploads/images/gallery/2023-07/scaled-1680-/lkyKVwBsIXGOqCV3-screenshot-20230720-2115181.png) ](https://book.traxpire.cloud/uploads/images/gallery/2023-07/lkyKVwBsIXGOqCV3-screenshot-20230720-2115181.png)[![Screenshot_20230720-212605[1].png](https://book.traxpire.cloud/uploads/images/gallery/2023-07/scaled-1680-/BxbPS3YuBnuMFJZk-screenshot-20230720-2126051.png)](https://book.traxpire.cloud/uploads/images/gallery/2023-07/BxbPS3YuBnuMFJZk-screenshot-20230720-2126051.png) [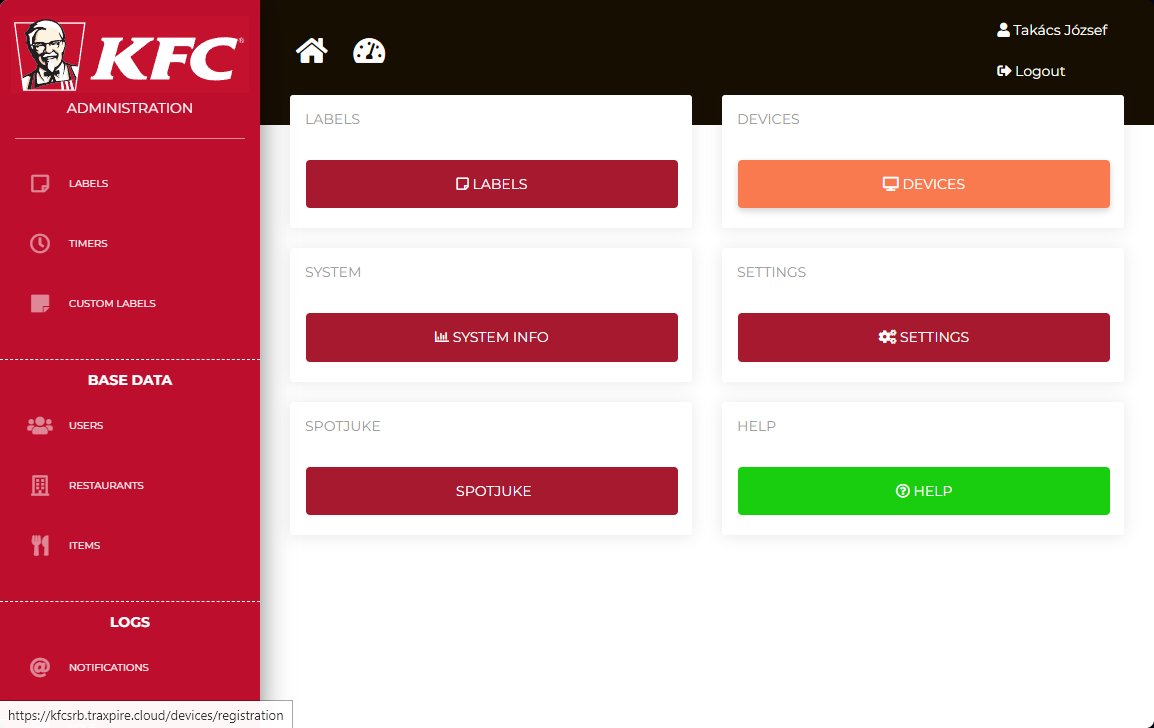](https://book.traxpire.cloud/uploads/images/gallery/2023-07/uvXurJFKuGV4qv34-image.png) [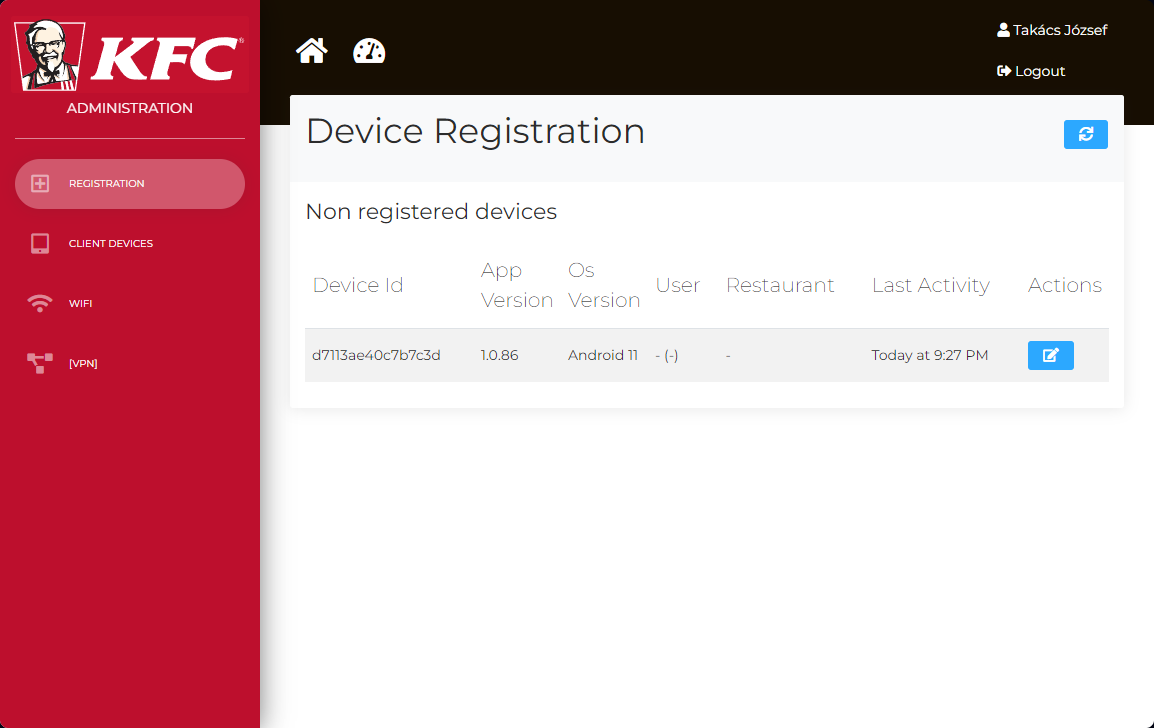](https://book.traxpire.cloud/uploads/images/gallery/2023-07/ddSGL8mFvXsErcSh-image.png) [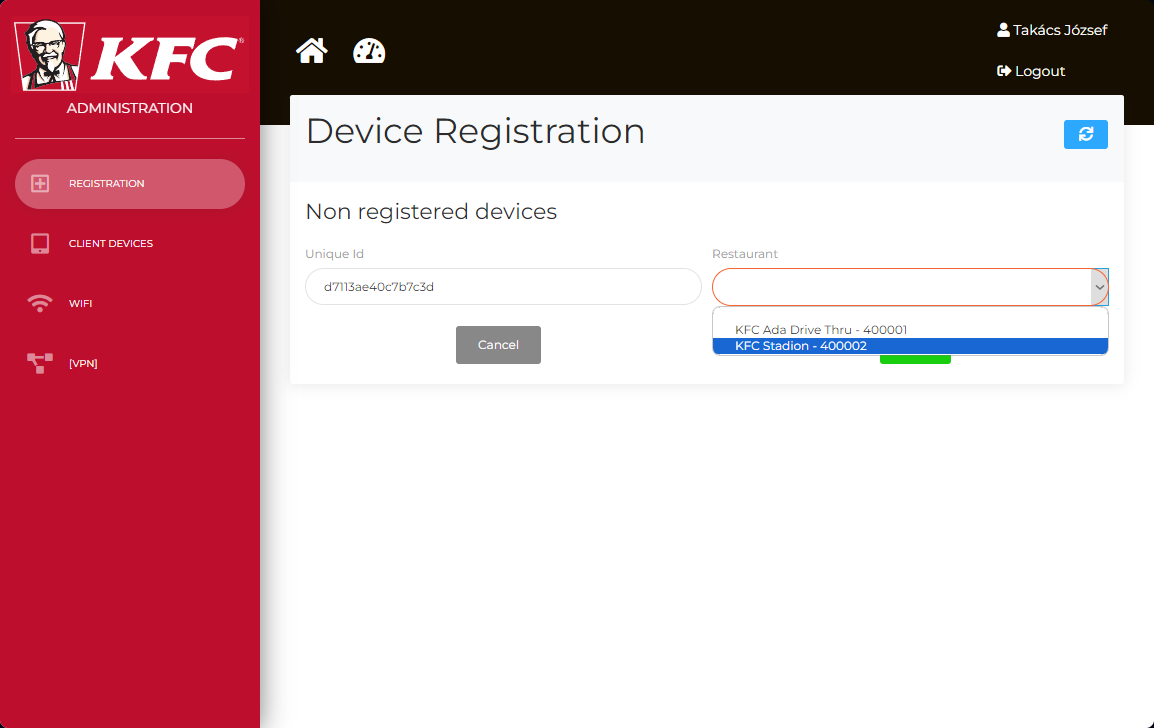](https://book.traxpire.cloud/uploads/images/gallery/2023-07/lyiEwgbcoirfUdoF-image.png) [![Screenshot_20230720-213006[1].png](https://book.traxpire.cloud/uploads/images/gallery/2023-07/scaled-1680-/nj7ovQeE1QcRwuMV-screenshot-20230720-2130061.png)](https://book.traxpire.cloud/uploads/images/gallery/2023-07/nj7ovQeE1QcRwuMV-screenshot-20230720-2130061.png) # Setting printersIn the case of network printing, the program checks every minute if the printer is accessible. If it is not, it will attempt to rediscover it. It is recommended to use a static DHCP server because the connection is based on IP address, which may change if network devices are restarted.
3 dot menu -> Settings
### Sunmi V2s **Brand:** sunmi **Sunmi Label Height:** 25 *Further settings do not have an impact in this case.* [![IMG_20230720_214406[1].jpg](https://book.traxpire.cloud/uploads/images/gallery/2023-07/scaled-1680-/4FTSMW9o2m4mKEAL-img-20230720-2144061.jpg)](https://book.traxpire.cloud/uploads/images/gallery/2023-07/4FTSMW9o2m4mKEAL-img-20230720-2144061.jpg) ### Brother QL-\_\_\_ #### WiFi/EthernetPrinter setup: [books/devices/page/brother-ql-w-series-wifi-setup](https://book.traxpire.cloud/books/devices/page/brother-ql-w-series-wifi-setup)
**Brand:** Brother **Interface:** Net **Paper Type:** W62 (DK-22205) 1. Press "Search and select printers" 2. Wait for 1-3 seconds 3. Select the printer [![Screenshot_20230720-214614[1].png](https://book.traxpire.cloud/uploads/images/gallery/2023-07/scaled-1680-/cf1tG5gmTyoMsFUi-screenshot-20230720-2146141.png) ](https://book.traxpire.cloud/uploads/images/gallery/2023-07/cf1tG5gmTyoMsFUi-screenshot-20230720-2146141.png)[![Screenshot_20230720-215205[1].png](https://book.traxpire.cloud/uploads/images/gallery/2023-07/scaled-1680-/W4REH7WtcogkJHPd-screenshot-20230720-2152051.png)](https://book.traxpire.cloud/uploads/images/gallery/2023-07/W4REH7WtcogkJHPd-screenshot-20230720-2152051.png) #### Bluetooth **Brand:** Brother **Interface:** Bluetooth **Paper Type:** W62 (DK-22205) 1. Pair the printer via Bluetooth 2. Press "Search and select printers" 3. Enable Bluetooth connection 4. Wait for 1-3 seconds 5. Select the printer [![Screenshot_20230720-215806[1].png](https://book.traxpire.cloud/uploads/images/gallery/2023-07/scaled-1680-/7GWtWiTTuIhJuuZb-screenshot-20230720-2158061.png) ](https://book.traxpire.cloud/uploads/images/gallery/2023-07/7GWtWiTTuIhJuuZb-screenshot-20230720-2158061.png)[![Screenshot_20230720-215817[1].png](https://book.traxpire.cloud/uploads/images/gallery/2023-07/scaled-1680-/HExLvfwfPdFd5C6D-screenshot-20230720-2158171.png) ](https://book.traxpire.cloud/uploads/images/gallery/2023-07/HExLvfwfPdFd5C6D-screenshot-20230720-2158171.png)[![Screenshot_20230720-215837[1].png](https://book.traxpire.cloud/uploads/images/gallery/2023-07/scaled-1680-/LYvwHscdlgxvZs87-screenshot-20230720-2158371.png)](https://book.traxpire.cloud/uploads/images/gallery/2023-07/LYvwHscdlgxvZs87-screenshot-20230720-2158371.png)[ ![Screenshot_20230720-215845[1].png](https://book.traxpire.cloud/uploads/images/gallery/2023-07/scaled-1680-/d055o6T8vrVvESwV-screenshot-20230720-2158451.png)](https://book.traxpire.cloud/uploads/images/gallery/2023-07/d055o6T8vrVvESwV-screenshot-20230720-2158451.png) # Application screens ### [![Screenshot_20230720-221041[1].png](https://book.traxpire.cloud/uploads/images/gallery/2023-07/scaled-1680-/NF35l1X9lIEBXruM-screenshot-20230720-2210411.png)](https://book.traxpire.cloud/uploads/images/gallery/2023-07/NF35l1X9lIEBXruM-screenshot-20230720-2210411.png) ## Main controls ### Header: 1. Current device time 2. Category filter 3. Network connection state (solid white means "OK", flashing white means "Searching for server") 4. "3 dot" menü - Printer status (Jumps to printer settings) - Do full sync (full server sync NOW) - Information (registration info) - Settings - Check for Update (forced check for new app version) - About ### Labels List of printed or saved labels. At the end of the line, the green indicator signifies successful server synchronization. Clicking on the line allows you to reprint or delete the item. The items are displayed in order of expiration, showing the ones that will expire first at the top.After the expiration of the item - during opening hours and 30 minutes prior to it - the device emits an audible **alert at maximum volume** and marks the row with red background color. The alert will continue to repeat until the item is deleted.
If a product doesn't have an expiration date set on server, it is considered a durable item. In such cases, the user can freely set the expiration date. If none of the durable items appear in the "Labels" list, the application will eventually notify the user with a pop-up window.
### Timers There are automatically recurring countdowns that cannot be stopped. To delete them, you need to press and hold the name of the timer for more than 10 seconds. Expired countdowns emit an audible alert **at maximum volume**, using a different tone compared to the label sound. ### Reports Here is a list of items that do not appear on the "Labels" screen. (*In the future, this menu option will be removed.*) ### Custom *It contains features used in specific Hungarian markets.* "Donation" - provides guidelines for handling and using donated meat-based items. "Custom" - allows for custom, two-line labels. For example, it can be used to mark waste products. The labels printed here are not logged. ### # Web management # Starting screenThe features available to all customers can be accessed by clicking on the "home" icon after logging into the website.
[](https://book.traxpire.cloud/uploads/images/gallery/2023-07/950E1KGwXLnNWOk1-image.png) ### Sidebar items: #### Labels: It contains the list of labels saved or printed by the application.By default, when configured with appropriate mail settings and valid email addresses, the server sends notifications about expired but not deleted items. After 1 hour, a notification is sent to the general manager, and after 3 hours, a notification is sent to the area coach.
#### Timers: It contains the list of timers recorded in the application. (It does not show the current time of the timers.) #### Custom labels: It contains the list of custom, two-line labels and allows for adding new ones. #### Users: User management #### Restaurants: Restaurant management. Every restaurant needs to be configured with the following settings: - "Identifier" (MPK number) - "Name" - "Place type" - "Delivery" (some products are delivery-only) - "Region" - "Opening hours" - a technical user, with role "user" (for example: 400001) - a general manager, with role "general\_manager" - an area coach, with role "area\_coach"If no opening hours are set for a restaurant, the devices will not emit any audible alerts. If a restaurant never closes, the value of 00:00-23:59 needs to be specified.
#### Items: Food items tree. The "Label template" determines the format of the printed label. The "normal" template contains only two lines: preparation time and expiration time. The "meat" type is reserved for meats. The "frozen" type includes a defrosting time as well.If a product doesn't have an expiration date set on server, it is considered a durable item. In such cases, the user can freely set the expiration date. If none of the durable items appear in the "Labels" list, the application will eventually notify the user with a pop-up window.